How to Teach Cardinal Directions to Children

This post contains affiliate links at not extra cost to you. Thank you for your support!
Where am I in space and time? People’s identities are often so tied to where they grew up, their location, and all the places they’ve been. This is no less important for children. Actually it could well be much more important to someone who has little experience in this world. Where they have been, where they are right now, and where they will be going may be most of their little world. Its importance should not be underestimated.
Through our work with children we have seen them feel more grounded when they have tangible knowledge about where they are and where their grandparents or other loved ones are as well. Not only this, but they are anxious to see this information over and over again - even as old as 6 & 7 years. We have had children ask many times in a week or month to show us again where a family member lives, or where they are flying to at the end of the month. Children know that traveling occurs, but once people are out of sight what happens to them? What does it mean that dad has flown to Spain for a few weeks? We can bring all of this abstract thought to a place of tangibility when we break down geography to the most basic levels...to directions…and then build from there.
Basic Lessons on Directions
Directions in the Play Yard/Backyard
We can go outside with younger children and older ones who still do not have the grasp of their cardinal directions. For these first lessons go outside at the same time in the morning for a few days and note where the sun is. Remind children to never look directly at the sun. It is helpful to make it early enough that the sun is still far into the east. Next, go out during midday for a few days and note where the sun is now and what changes they have noticed. Lastly, as we get later in the day and the sun is definitely in the west you can take them outside at roughly the same time for a few days and point out where the sun is during this time of day. It could be a real treat to watch the sunset for several days in a row. The children, and you, will have the opportunity to see how the sky lights up differently each day. This is also an indirect preparation for discussions on clouds, weather, and how they may affect how a sunset appears.
Once you’ve gotten a week or two of observations under your belts concerning where the sun falls during different times of day the children will be ready for the presentation on the Directions in the Play Yard (or backyard).

You will need the Directions Signs for the Play Yard and a piece of yellow paper cut into a circle. This lesson becomes incredibly fun when the children are allowed to come with you to place the cards before returning to “base”.
Set the yellow circle in the center of the play yard on the ground. This will become “base”.
Begin by asking the children where they have seen the sun in the morning each day. They should all point towards the east.
Let the children know that this direction has a name. It is called east.
Together, place the correct sign on the east of the play yard and return to base.
Ask the children where the sun always sets in the evenings. Once you are in agreement that it sets in the west you may tell them that this direction also has a name. It is west.
Together, place the sign for it on the west of the play yard and return to base.
Now that east and west have been discovered you can stand at base while facing south. All the children should be facing you to the north.
Turn around to face north with the children while making sure they stay facing the same direction.
With your right hand point to the east sign and say. “We know that this way is east. Please point to the east. We now get to learn about a very important direction. It is called north”.
Point your left hand north, while keeping your right hand up, and say, “This direction is north”. You may now drop your right hand and only point with your left hand towards the north.
You may now place the north sign on the north side of the play yard and return to base.
Make sure everybody is facing south.
Now you can show them the last direction for this lesson. Point towards the west with your right hand and say “We have learned that this is west. Everyone please point west.”
Once they do, you may use your left hand to point south, while keeping your right hand up, and say, ”This direction is the last one to learn today. It is called south. Can everyone say south?” You may now drop your right hand and only point with your left hand towards the south.
Now you may go together to place the sign on the south part of the yard.
Now that everything has been placed you can begin playing a game of directions. The adult stands at base and calls out the direction for everyone to run towards. Children adore this game. The adults can sometimes have children run back to base instead of a particular direction. Once the children have multiple opportunities to play this game you can begin adding fun movements like twirling to the south wall, or skipping to the east side.
Have fun with it!
Extensions for elementary students:
Polaris is the North Star and a great deal of work can be done with older children to bring awareness to this important guide that people have used for millennia. Heck! It is scheduled to be in its relative spot for about another 26,000 years or so. This undoubtedly will bring up conversations surrounding constellations. This guide is a great jumping off point for those living in the northern and western hemispheres.
Directions in the Classroom/Home
Now that the children have plenty of experience with directions outside while using the sun as their guide, you can begin bringing that indoors. Instead of the large signs we will use some smaller wall signs that can stay up year round and be added to later.

Get your Classroom Directions Signs for Free by signing up for
exclusive access to our Free Resource Library
For this Large Group Presentation you will only use the signs for north, south, east, and west. All the others can be saved for later when the children are feeling very comfortable with the first four. Before the presentation begins you may tape the directions on the walls of the classroom in the correct directions. Do your best to be accurate, but don’t sweat it if your classroom leans a little north, north west. That is something they will learn as they grow older.
Once together at the circle the adult may say something like, “We have really enjoyed our time learning about directions outside. Today we get to learn to see those same directions in our classroom. Let’s begin with north”.
The adult stands up and faces the north side of the classroom.
Ask everyone to stand up and face the same direction as you.
Point to the sign on the wall and say, “This is north. See this sign? It says north. This is the north side [wall, part] of our classroom.”
Have everyone return to their place at the circle and say, “Now we will find the south side [wall, part] of our classroom”.
Go on as before and introduce south, then east, and last of all west; making sure to note that east is the direction where the sun rises and west is where the sun sets.


Once all the directions have been introduced you may begin playing a game. Everyone stands while facing north (including the adults) Say, “Everyone please take two steps to the north. Now everyone take three backwards steps to the… south. Turn your body to the… east side of the classroom (wait a moment for the bossy ones to correct everyone else - hehe). Now face the… west side of the classroom”. From here you can do all kinds of fun things like slide to the east and then hop on one leg to the south. This is something we do often in class so as to get children comfortable with directions. Children could additionally be excused from the circle according to directions or asked to line up on such, and such a wall. Perhaps a child is looking for a particular item. If it is against a wall of the classroom the adults should address the direction as a way to help the child find it. Directions should be used as much as possible in class and outside once the lessons have been introduced. It is amazing to parents when their children start talking in terms of directions.
Extensions for Elementary Students:
Mother May I: Directions Edition is such a fun game to play with elementary students.
Instead of the children asking questions in the normal format they need to ask permission using a direction such as… “Mother may I take two large scissor steps to the north?”. The child who is acting as mother then answers using directions such as… “No you may not. You may take one small scissor step to the north and one large scissor step to the east.” Can’t you just imagine all the hilarity of this kind of game? So fun!
Compass Rose Three-Part Cards
Once children have had a chance to play direction games and make them part of their daily routine it is time to introduce them to the Compass Rose.
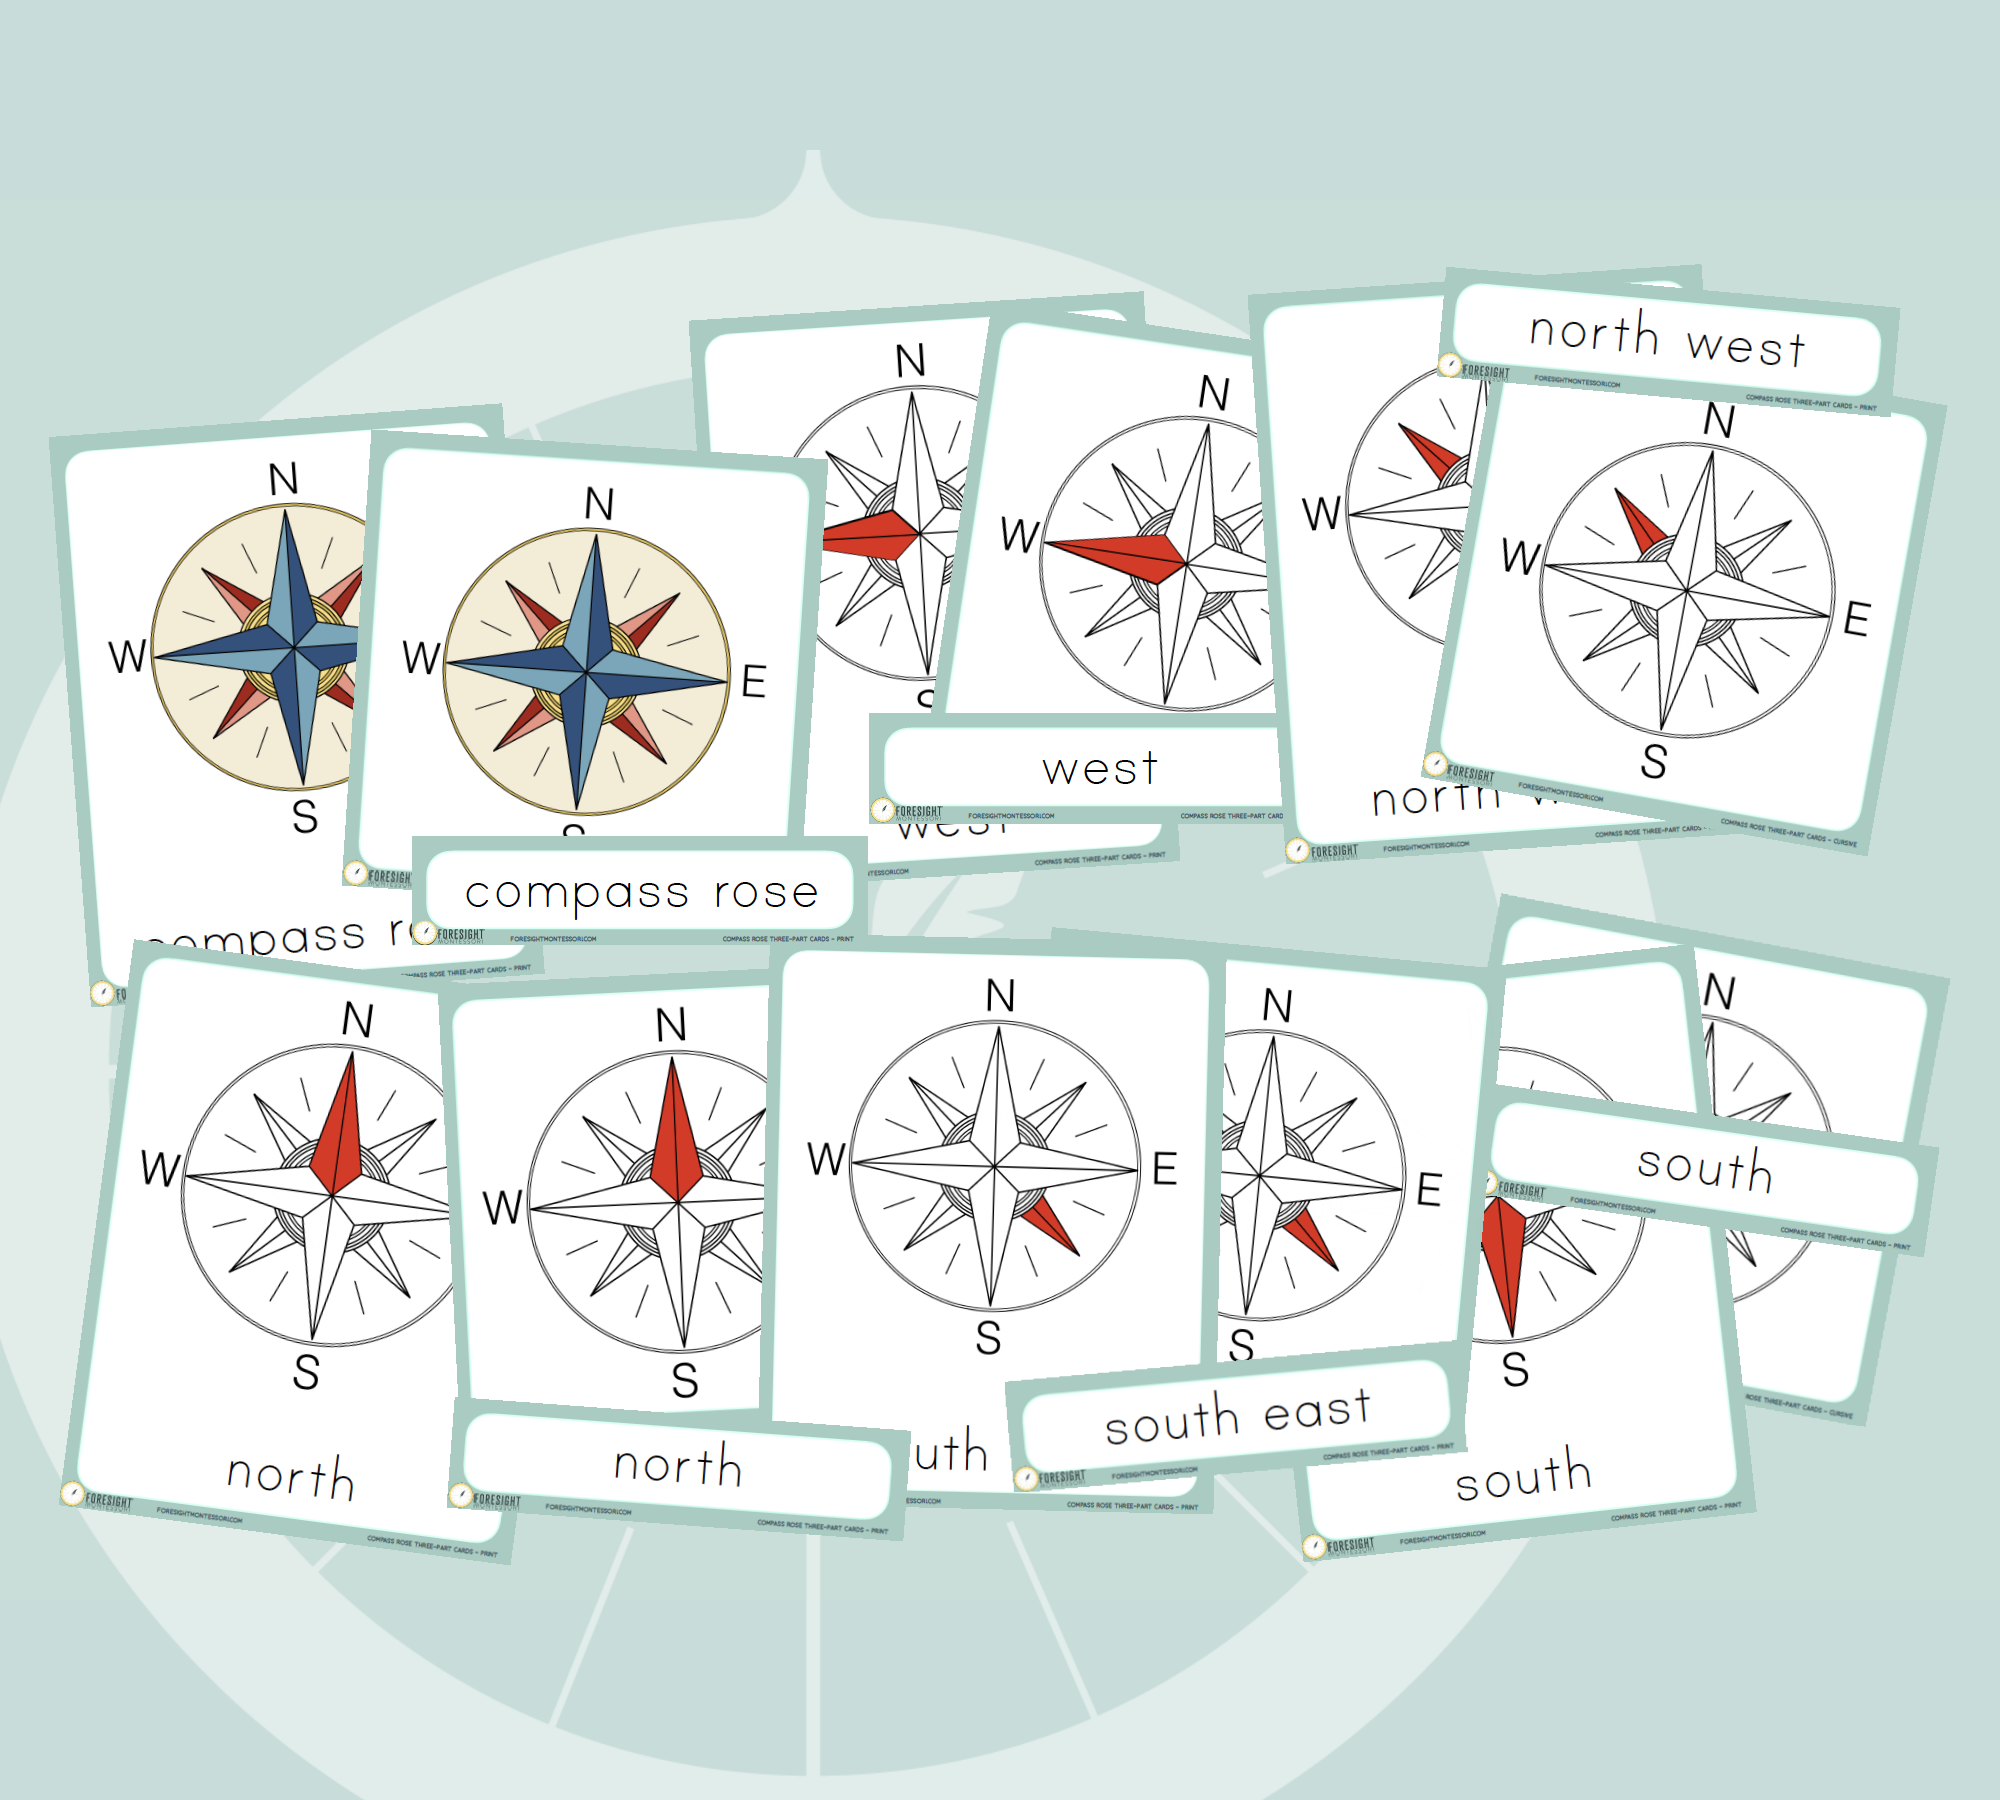


We are in love with this new set of Compass Rose Three-Part Cards. They are beautiful, have clean lines and an aesthetic that will draw in children, include all the major directions, and also give an indirect preparation that there are more directions they can learn in the future.
If you need information on how to present three-part/nomenclature cards we suggest you watch this video HERE.
Compass Rose Blackline Masters
Once the child has worked with the Compass Rose Three-Part Cards, they may create their own Compass Rose Booklet.


Our blackline masters do not include a line on purpose. So many children who are really into making booklets are still not ready to be writing on lines. In fact many of these children really need their words written in yellow highlighter so they can be successful in creating their own booklet with words. Step by step you can help a child move from needing a lot of help to becoming independent in looking at the letters and writing them on their own.
In this set there is a blackline master, but the last several pages have the words in a light gray. These pages exist to aid the adult in creating the example booklets. Since children will be looking at these letters to make their own it is important they are formed correctly.
In our classroom we have what is called the Author's Chair. It is a simply incredible way to encourage children of all ages to write and create. Anyone who has made something with words may read it at the circle with or without help. These types of booklets get read all year long. We practice our audience etiquette and clap for everyone who has something to read. We used to only invite those who completed a Writer’s Workshop story to read at Author’s Chair but then one day a little first year asked if they could read their booklet they spent all day working on. The potential for this little booklet to create a flurry of work was understood and since then little booklets have been read and read and read to the delight of the creators and their peers. They cheer for the ones who have made their first book ever and they cheer for the ones who are writing all the words independently for the first time. It is a community building experience. You know… child directed experiences are the best!
Bridging between Compass Rose and Map Work
When children know their directions, or are at least improving in their mastery, they can begin using these labels to make their map work a little more interesting. In this presentation a puzzle map control (or other map) with a compass rose is set up at a floor space. The Compass Rose Three Part Cards are also brought to the floor space. The compass rose on the control map is pointed out to the child and they are told that they are both the same thing. The adult and child can then review what all the directions on the compass rose are. This prepares the child for the Cardinal Points Labels for Map Work
Cardinal Points Labels for Map Work
When the adult can see that the child has a decent understanding of directions through the previous works, they can move onto using labels in their Map Work.
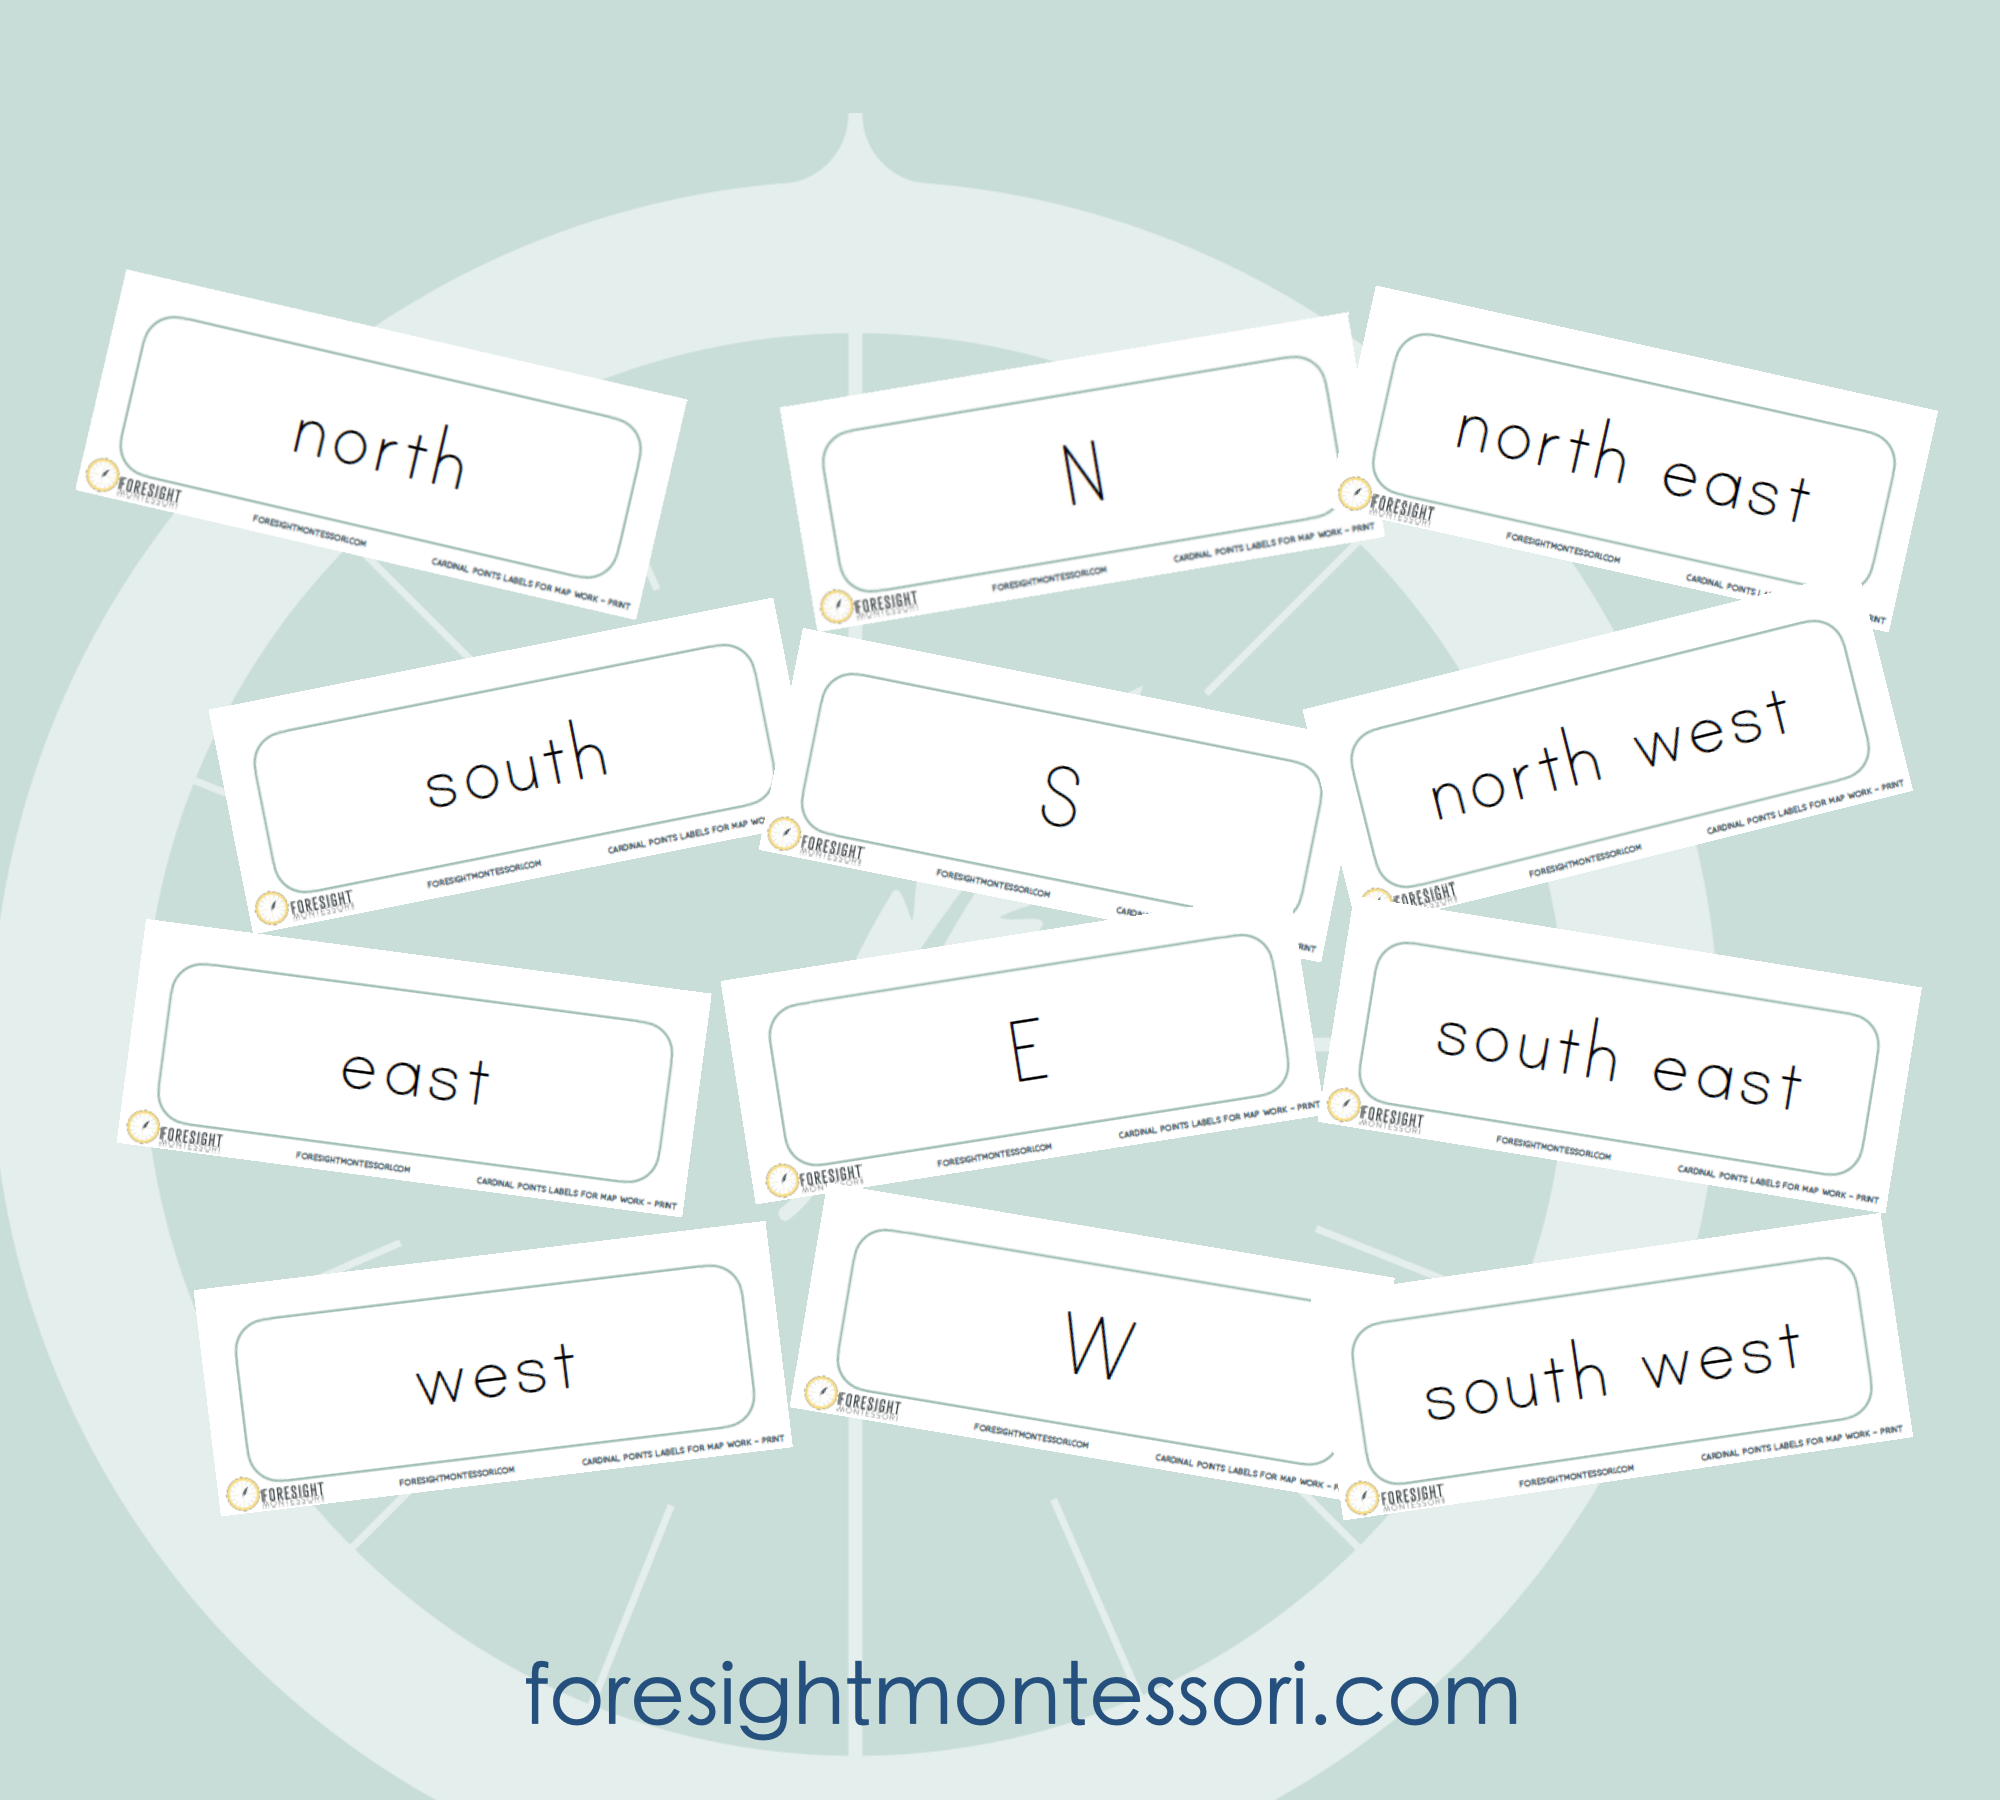
A Puzzle Map (or other map) and its control are brought to a floor space together. These labels are also brought to the floor space. The guide indicates that only the first four labels will be used at this time (north, east, south, west). The others will be used later on. The guide proceeds to point out the compass rose on the control map. Pointing to the N the adult says, “This N is for North. This is the label for north. I will place it on the north side of the puzzle”. The label with the word north is placed. This step is repeated through north, east, south, and west labels. The child is invited to use the work. If the child is older or finds this to be very easy the labels with N, S, E, and W may be added. The in-between directions (north east, south east, north west, south west) should be added at a later date when the child has shown mastery of the first 8 labels. Children who are feeling pretty good with their directions are ready to begin mapping work.
In the meantime we encourage you to get your free Classroom Directions Signs by clicking below to get access to our whole Free Resource Library!


Better yet, purchase the entire printable bundle INCLUDING the Classroom Directions Signs.
In this bundle you will find:
Directions Signs for the Play Yard
Classroom Directions Signs
Compass Rose Three Part Cards
Compass Rose Blackline Masters
Cardinal Points Labels for Map Work
AND… Each printable comes in three fonts: print, d’nealian, and cursive
Cardinal points and directions are super fun to learn and practice. We hope you will have as joyful an experience teaching about cardnial directions with the children in your lives as we have.
